For enhanced security, organizations can set up their Mark AI account to use SAML Single Sign-on (SSO)
Who can use this feature
For Enterprise plans who have subscribed to an SSO addon only.
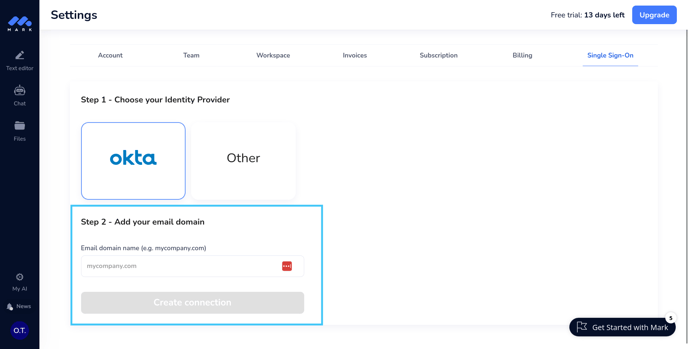
Step 1 - Select your IdP (Identity Provider)
You can set up single sign-on with any identity provider. We are also working on actively supporting Okta.

Step 2 - Add your email domain
Enter the email domain that you have set up with your IdP (e.g., "mycompany.com"). All users from your team will have to use email addresses containing this domain to sign in via SAML SSO.
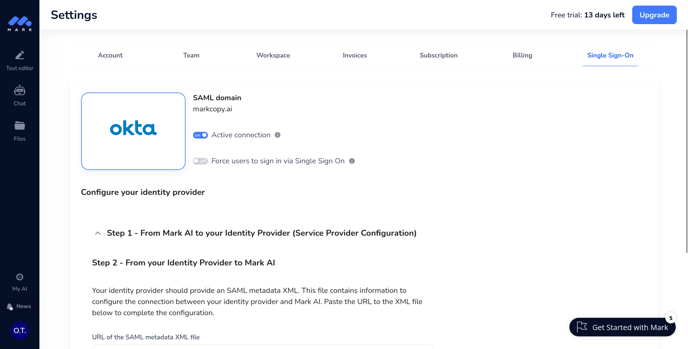
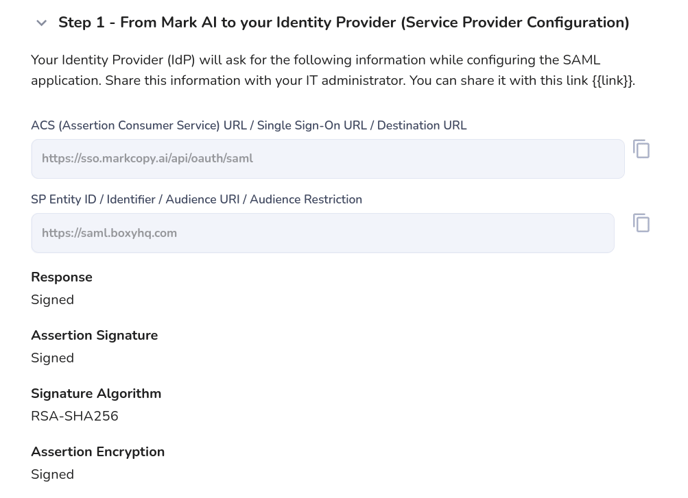
Step 2 - Configuration on your Identity Provider (IdP)
At this point, the connection has been initialized but is not yet configured. You should see this screen no matter which identity provider has been selected.
Step 2 - Guide for Okta
If you are using Okta as Identity Provider, you do not need information from Service Provider. Instead, you can head over to Okta and install the Mark AI application.
Once installed, you can move to the last step.
Prerequisites
You must have a valid Okta account.
Supported Features
- IdP-initiated SSO
- Just-In-Time provisioning
- Force authentication
For more information on the listed features, visit the Okta Glossary.
Note
The following SAML attributes are supported:
| Name | Value |
| id | user.id |
| user.email | |
| firstName | user.firstName |
| lastName | user.lastName |
Configuration steps
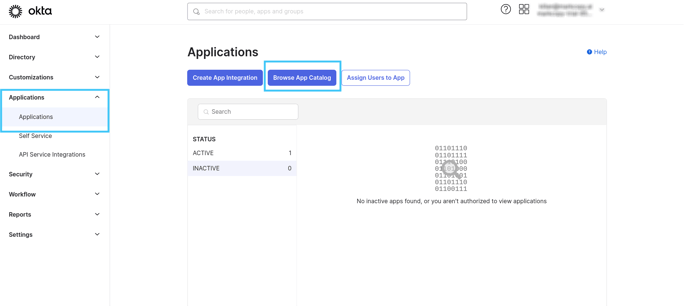
- Add the Mark AI application to your Okta account by navigating to your Applications page and clicking Browse App Catalog.
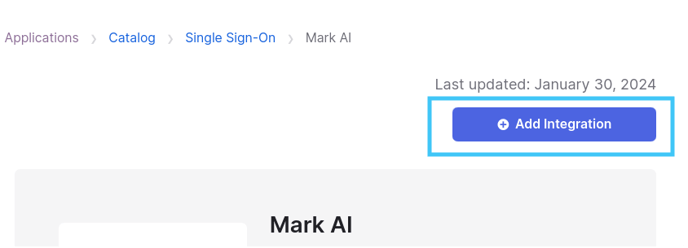
Search for "Mark AI" - Click on the "Mark AI" app and then click on the "Add integration" button on the opened page. This will install the Mark AI integration on your account.
-
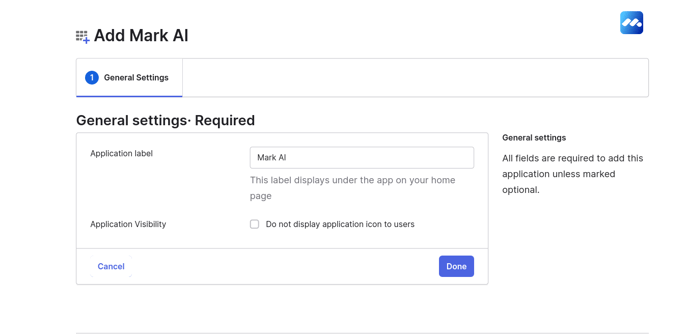
You will be prompted to provide an Application label. Enter "Mark AI".
On this step you can also enable the display of the application to users. You will be able to edit these settings later. Once you have selected your preferences, click Done.
- You have no added the Mark AI integration but there are a few steps left. First, click on the Sign-On tab.
Make sure you select SAML 2.0 and copy the metadata URL, this URL will be necessary to complete the configuration.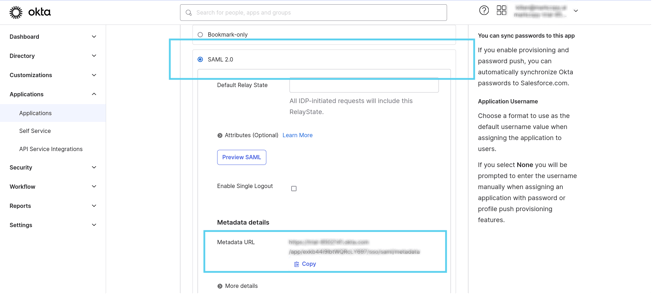
You will need to encrypt the assertion, click on Edit in the Settings section.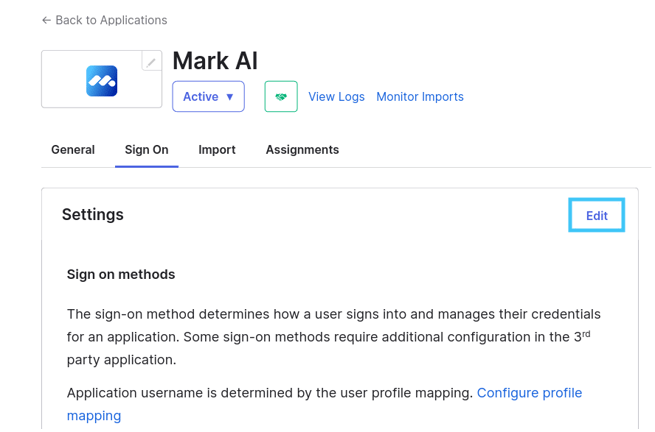
After clicking on the Edit button, you will then see a field where you can upload Mark AI's encryption public certificate.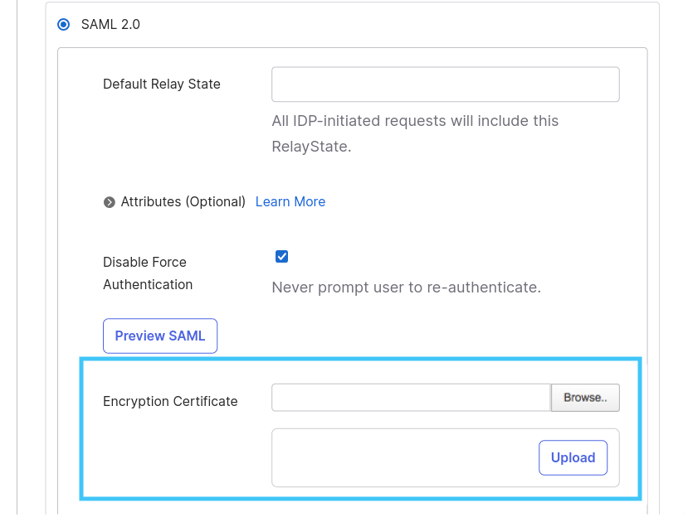
You will find this certificate on your Mark AI's account settings, under the Single-Sign-On tab. The link to the file is on step 1: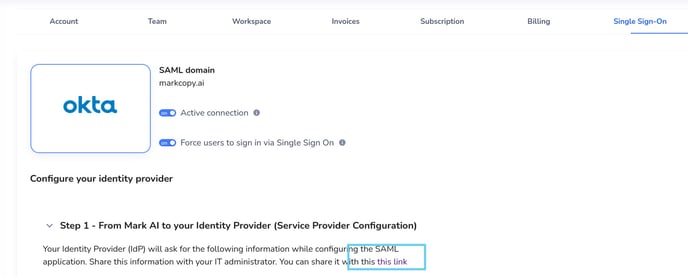
- Click Done, the application has now been added to your Okta organization. Click Assign to add the team members or groups who should have access to Mark AI. This includes yourself.
You will be able to find this metadata URL even after the integration is completed. To do so, head over to your Mark AI's application page, you will find the metadata URL under the Sign-On tab.
Now you can move to step 3 (below) to complete the configuration, you will need the metadata URL you've just copied.
Step 2 - Guide for other Identity Providers
If you expand Step 1, you will get a summary of all information required by your identity provider. Copy and paste these information on your Identity Provider and save.
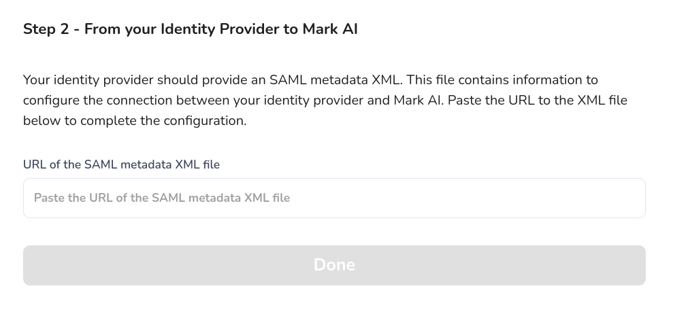
Step 3 - Copy integration info from your Identity Provider to Mark AI
This is the last step before Single Sign On is fully configured. Your Identity Provider should provide an XML metadata file, which is necessary to complete configuration.
- Get the URL of that XML file
- Paste it into the corresponding field on step 2
- Click "Done"
Step 4 - Secure your account
You will find 2 options on the Single Sign On tab:
- Activate: if disabled, none of your team members will be able to use Single Sign On.
- Force: if enabled, all your team members will be forced to log in via Single Sign On. Logging in via email/password or Google won't work anymore.